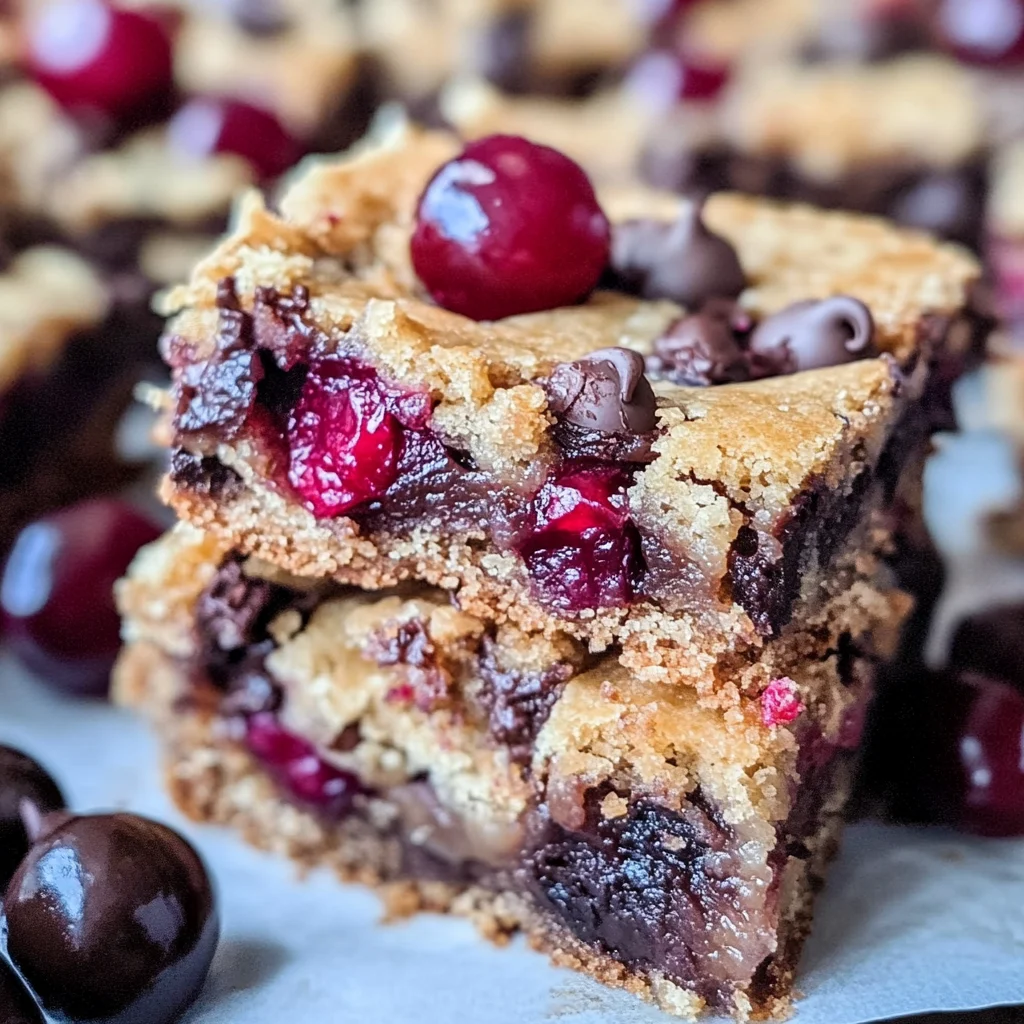
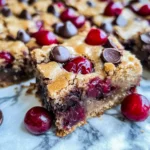
Chocolate Chip Cherry Bars
These Chocolate Chip Cherry Bars are a delightful treat that combines rich flavors and a chewy texture, making them perfect for any occasion. Whether you’re hosting a gathering or simply craving something sweet, these bars will impress your guests or family. The combination of semi-sweet chocolate and juicy cherries creates a flavor explosion in every bite. Plus, they’re easy to make and use simple ingredients that you likely already have on hand.
Why You’ll Love This Recipe
- Quick to Prepare: With just 10 minutes of prep time, you can whip up these delicious bars in no time.
- Irresistible Flavor: The blend of chocolate and cherries creates a sweet and tart flavor that pairs perfectly together.
- Versatile Treat: Enjoy them as a dessert, snack, or even breakfast for a sweet start to your day.
- Easily Customizable: Feel free to mix in your favorite nuts or swap cherries for other fruits if desired.
- Perfect for Sharing: Cut into squares, these bars are great for parties, potlucks, or just sharing with friends.
Tools and Preparation
To make the Chocolate Chip Cherry Bars, you’ll need some essential kitchen tools for an efficient baking experience.
Essential Tools and Equipment
- Mixing bowls
- 8-by-8-inch baking pan
- Spatula
- Measuring cups and spoons
Importance of Each Tool
- Mixing bowls: These are crucial for combining ingredients smoothly without any mess.
- 8-by-8-inch baking pan: This size is perfect for achieving the right thickness in your bars.
- Spatula: Use this tool to spread the batter evenly in the pan and ensure every corner is filled.
Ingredients
These cherry bars use my favorite blondie base and turn out perfectly every single time!
Ingredients:
– 1/2 cup unsalted butter (melted (1 stick))
– 1 cup light brown sugar (packed)
– 1 large egg
– 2 teaspoons vanilla extract
– 1 cup all-purpose flour
– 1/4 teaspoon salt (optional)
– 3/4 to 1 cup semi-sweet chocolate chips
– 1 cup cherries (fresh or frozen)
How to Make Chocolate Chip Cherry Bars
Step 1: Preheat the Oven
Preheat your oven to 350°F. Line an 8-by-8-inch pan with aluminum foil and spray it with cooking spray; set aside.
Step 2: Melt the Butter
In a medium microwave-safe bowl, melt the butter for about 60 seconds until fully melted.
Step 3: Combine Sugar and Butter
Add the light brown sugar to the melted butter and stir until well combined.
Step 4: Add Egg and Vanilla
Incorporate the egg and vanilla extract into the mixture. Stir until everything is well blended.
Step 5: Mix Dry Ingredients
Add all-purpose flour and optional salt. Stir gently until just combined; be careful not to overmix as this can make the blondies tough.
Step 6: Fold in Chocolate Chips and Cherries
Gently fold in semi-sweet chocolate chips and cherries. You can leave the cherries whole for larger chunks if desired. Pour the batter into your prepared pan, smoothing it out evenly with a spatula.
Step 7: Bake
Bake in the preheated oven for about 27 to 32 minutes or until the edges begin to pull away from the sides of the pan, and the center is set.
Step 8: Cool Before Serving
Allow your chocolate chip cherry bars to cool for at least one hour before slicing into squares. Store leftovers in an airtight container at room temperature or refrigerate them for up to one week. They can also be frozen for up to three months.
How to Serve Chocolate Chip Cherry Bars
These delicious Chocolate Chip Cherry Bars can be enjoyed in various ways, making them perfect for any occasion. Whether you are hosting a gathering or simply indulging at home, here are some great serving suggestions to enhance your experience.
For a Light Snack
- With a Glass of Milk: Pair these bars with a tall glass of cold milk for a classic treat.
- On a Plate with Fruit: Serve alongside fresh berries or sliced apples for a refreshing contrast.
As Dessert After Dinner
- Warm with Ice Cream: Heat the bars slightly and top with vanilla ice cream for an indulgent dessert.
- Drizzled with Chocolate Sauce: Add a drizzle of chocolate sauce on top for extra sweetness and richness.
At Parties and Gatherings
- Cut into Bite-Sized Squares: Perfect for sharing, these bars can be cut into smaller pieces for easy snacking.
- Garnished with Whipped Cream: Top each bar with a dollop of whipped cream for an elegant touch.
How to Perfect Chocolate Chip Cherry Bars
To ensure your Chocolate Chip Cherry Bars turn out perfectly every time, follow these helpful tips. They will help you achieve the best texture and flavor.
- Use Fresh Cherries: Fresh cherries add more flavor and juiciness compared to frozen ones.
- Don’t Overmix the Batter: Mix until just combined to keep the bars soft and chewy.
- Check for Doneness Early: Start checking around 27 minutes; they should be set but not overcooked.
- Let Them Cool Completely: Allowing the bars to cool helps them set properly and makes slicing easier.
Best Side Dishes for Chocolate Chip Cherry Bars
Pairing side dishes with your Chocolate Chip Cherry Bars can elevate your snack or dessert experience. Here are some delightful options that complement their rich flavors.
- Vanilla Ice Cream – A creamy classic that balances the sweetness of the bars.
- Fresh Berries Salad – A mix of strawberries, blueberries, and raspberries adds freshness.
- Greek Yogurt Parfait – Layer yogurt with granola and berries for a nutritious side.
- Nutty Trail Mix – A crunchy trail mix provides texture contrast and is easy to prepare.
- Fruit Smoothie – Blend bananas, cherries, and yogurt for a refreshing drink.
- Cheese Platter – A selection of mild cheeses pairs well with the sweetness of the bars.
Common Mistakes to Avoid
When making Chocolate Chip Cherry Bars, avoiding common mistakes can ensure your dessert turns out perfectly.
- Skipping the butter melting step: Always melt the butter before mixing. This step helps achieve the right texture and ensures even mixing.
- Overmixing the batter: Mix just until combined. Overmixing can result in tough bars instead of soft, chewy blondies.
- Not measuring ingredients accurately: Use proper measuring cups for liquids and dry ingredients. Accurate measurements are crucial for the right consistency and flavor.
- Ignoring baking time: Keep an eye on your bars as they bake. Every oven is different, so check for doneness a few minutes before the suggested baking time.
- Cutting too soon: Allow the bars to cool completely before cutting. This helps them set properly and makes slicing easier.

Storage & Reheating Instructions
Refrigerator Storage
- Store in an airtight container for up to 1 week.
- Place parchment paper between layers to prevent sticking.
Freezing Chocolate Chip Cherry Bars
- Wrap individual bars tightly in plastic wrap or aluminum foil.
- Place wrapped bars in a freezer-safe bag and freeze for up to 3 months.
Reheating Chocolate Chip Cherry Bars
- Oven: Preheat to 350°F, place bars on a baking sheet, and heat for about 10 minutes.
- Microwave: Warm one bar at a time for about 15-20 seconds on medium power.
- Stovetop: Heat in a skillet over low heat, covered, for about 5 minutes until warmed through.
Frequently Asked Questions
Here are some common questions about Chocolate Chip Cherry Bars that can help you perfect your recipe.
Can I use frozen cherries in my Chocolate Chip Cherry Bars?
Yes, frozen cherries work well! Just make sure to thaw and drain excess moisture before adding them to the batter.
What if I don’t have semi-sweet chocolate chips?
You can substitute with dark chocolate chips or milk chocolate chips based on your taste preference.
How do I make these bars gluten-free?
To make Chocolate Chip Cherry Bars gluten-free, substitute all-purpose flour with a gluten-free flour blend.
Can I add nuts to my Chocolate Chip Cherry Bars?
Absolutely! Chopped walnuts or pecans can add a nice crunch and flavor. Just fold them into the batter along with the chocolate chips and cherries.
How should I store leftover Chocolate Chip Cherry Bars?
Store them in an airtight container at room temperature or refrigerate them for longer freshness.
Final Thoughts
Chocolate Chip Cherry Bars are a delightful treat that combines fruity sweetness with rich chocolate flavor. They’re perfect for any occasion, whether as an after-school snack or a dessert at gatherings. Feel free to customize by adding nuts or experimenting with different types of chocolate!
Chocolate Chip Cherry Bars
Indulge in the delightful combination of rich chocolate and juicy cherries with these Chocolate Chip Cherry Bars. Perfect for any occasion, these bars offer a chewy texture and an explosion of flavor in every bite.
- Prep Time: 10 minutes
- Cook Time: 30 minutes
- Total Time: 40 minutes
- Yield: Approximately 16 servings 1x
- Category: Dessert
- Method: Baking
- Cuisine: American
Ingredients
- 1/2 cup unsalted butter (melted)
- 1 cup light brown sugar (packed)
- 1 large egg
- 2 teaspoons vanilla extract
- 1 cup all-purpose flour
- 3/4 to 1 cup semi-sweet chocolate chips
- 1 cup cherries (fresh or frozen)
Instructions
- Preheat your oven to 350°F. Line an 8-by-8-inch pan with aluminum foil and spray it with cooking spray.
- In a medium microwave-safe bowl, melt the butter for about 60 seconds until fully melted.
- Stir in the brown sugar until well combined.
- Add the egg and vanilla extract, mixing until blended.
- Gently fold in flour until just combined; avoid overmixing.
- Fold in chocolate chips and cherries, then pour the batter into the prepared pan.
- Bake for 27 to 32 minutes, or until the edges pull away from the sides, and the center is set.
- Allow cooling for at least one hour before slicing.
Nutrition
- Serving Size: 1 bar (44g)
- Calories: 180
- Sugar: 14g
- Sodium: 95mg
- Fat: 7g
- Saturated Fat: 4g
- Unsaturated Fat: 3g
- Trans Fat: 0g
- Carbohydrates: 25g
- Fiber: 1g
- Protein: 2g
- Cholesterol: 20mg