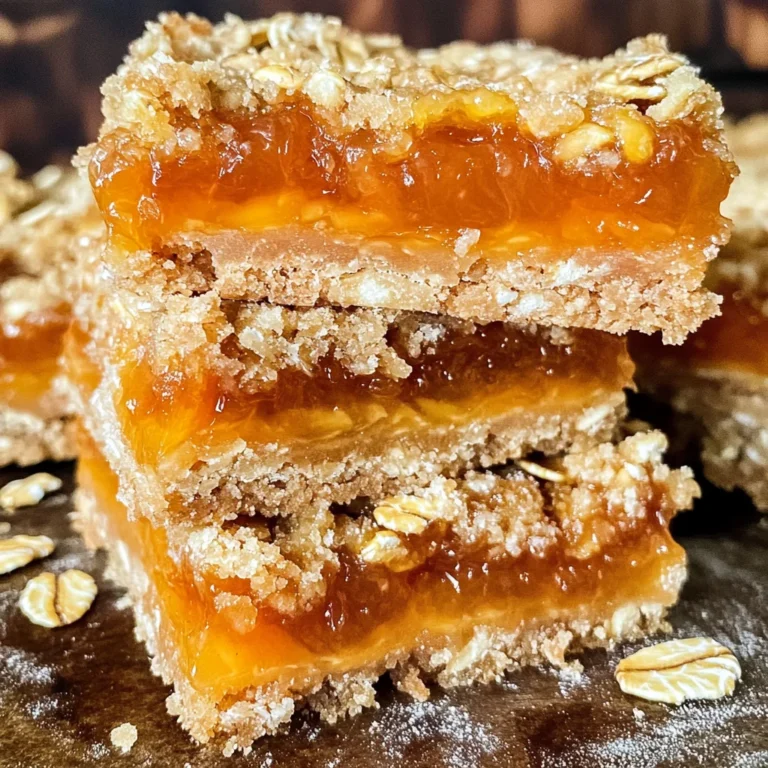
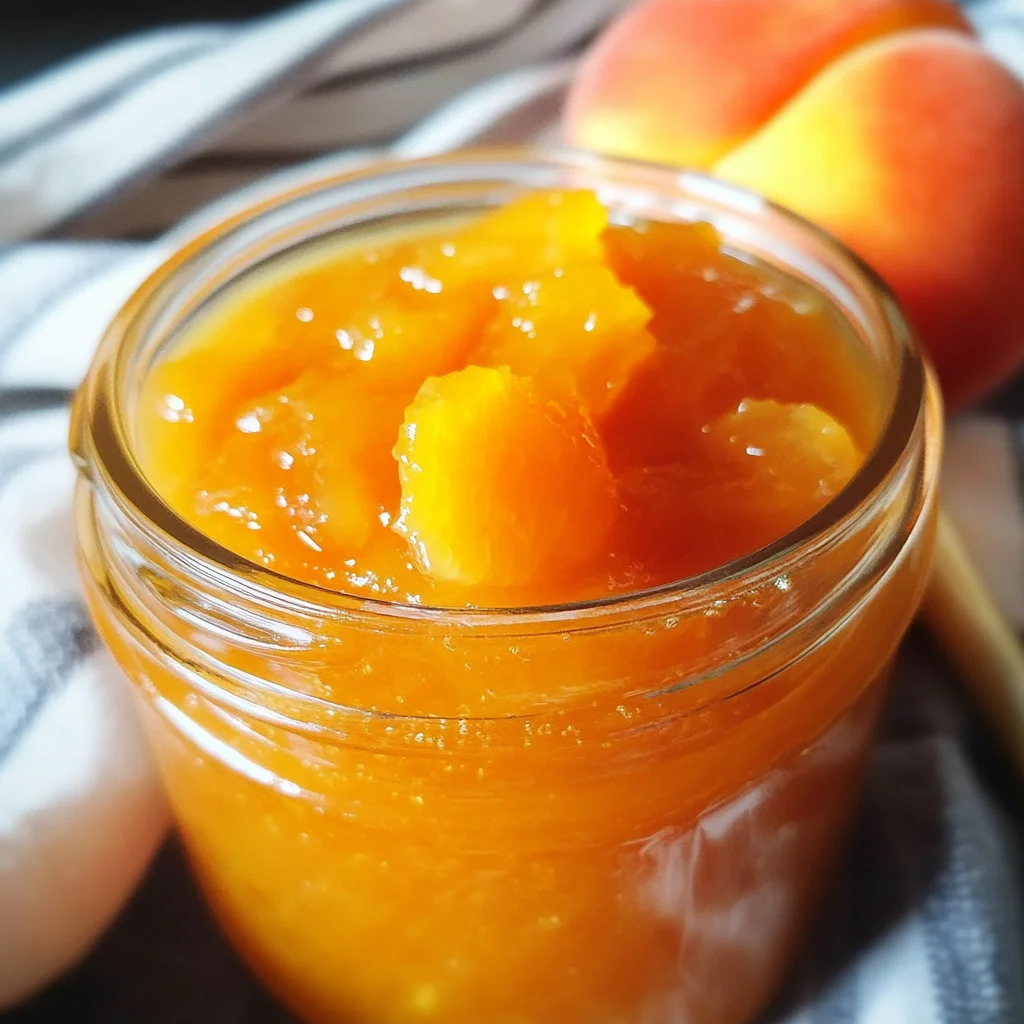
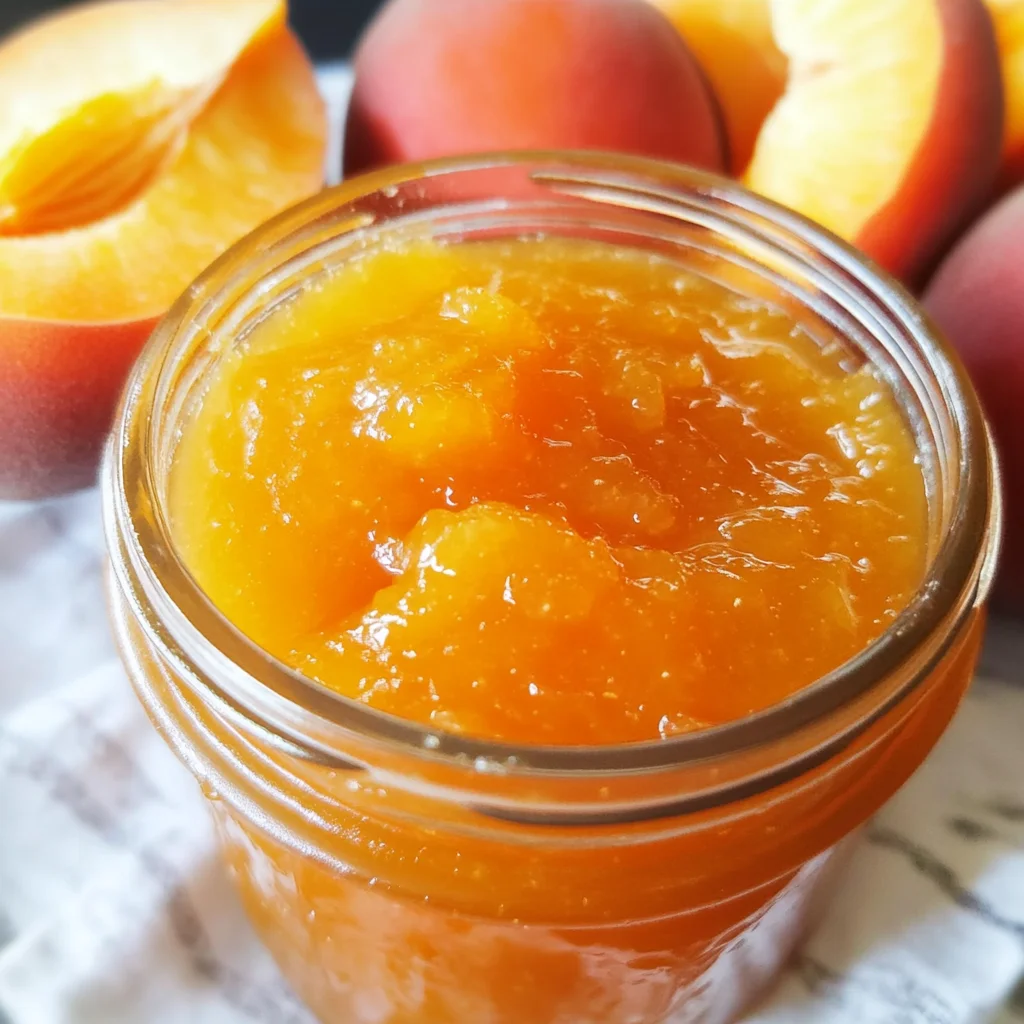
Apricot Jam Recipe
The Apricot Jam Recipe is a delightful treat that captures the essence of summer in every jar. Perfect for breakfast spreads, dessert toppings, or even as gifts, this jam brings a sweet and tangy flavor that complements many dishes. With its simple preparation and vibrant color, making your own apricot jam at home has never been easier. Enjoy it on toast, pancakes, or as a filling in pastries—it’s versatile enough to suit any occasion!
Why You’ll Love This Recipe
- Easy to Make: This recipe simplifies the jam-making process, making it accessible for beginners.
- Fresh Flavor: Using fresh apricots provides a burst of flavor that store-bought jams often lack.
- Versatile Uses: Perfect for spreading on bread, topping desserts, or even adding to savory dishes for a sweet contrast.
- Gift-Worthy: Homemade apricot jam makes for thoughtful gifts during holidays or special occasions.
- Healthy Option: Made with minimal ingredients, this jam avoids preservatives and artificial flavors.
Tools and Preparation
Before you dive into making your apricot jam, gather your tools. Having the right equipment ensures a smooth jam-making process.
Essential Tools and Equipment
- Boiling-water canner
- Large pot
- Jars (pint size)
- Ladle
- Measuring cups
Importance of Each Tool
- Boiling-water canner: This helps in safely processing jars to ensure your jam is sealed correctly.
- Large pot: Essential for combining ingredients and cooking the jam evenly without spilling.
- Jars (pint size): Properly sized jars are important for storing your jam securely and conveniently.
Ingredients
For the Apricot Jam
- 8 cups diced apricots
- 1/4 cup lemon juice
- 6 cups sugar
How to Make Apricot Jam Recipe
Step 1: Prepare Your Jars
- Bring a boiling-water canner, filled 3/4 full with water, to simmer.
- Wash jars (I used pint jars) and screw bands in hot soapy water; rinse with warm water.
Step 2: Prepare the Lids
- Pour boiling water over flat lids in a saucepan off the heat.
- Let stand in hot water until ready to use; drain well before filling.
Step 3: Combine Ingredients
- In a large pot, combine all three ingredients.
- Bring to a boil over medium-high heat while stirring occasionally until the sugar dissolves.
Step 4: Boil the Mixture
- Allow the mixture to reach a full rolling boil.
- Gently boil for 30 minutes, stirring frequently to prevent sticking.
Step 5: Jar the Jam
- Ladle immediately into prepared jars, filling them within 1/4 inch of tops.
- Wipe jar rims and threads clean with a cloth.
Step 6: Seal the Jars
- Cover each jar with two-piece lids and screw bands on securely.
Step 7: Process the Jars
- Place jars on an elevated rack in the canner.
- Lower rack into canner ensuring water covers jars by 1 to 2 inches; add boiling water if necessary.
- Cover and bring water to a gentle boil.
Step 8: Complete Processing
- Process jars for 10 minutes.
- Remove jars from canner and place upright on a towel to cool completely.
Step 9: Check Seals
- After cooling, check seals by pressing middles of lids with your finger; if they spring back, refrigeration is necessary.
This recipe yields approximately 5 pints or 10 half-pints of delicious apricot jam! Enjoy your homemade creation!
How to Serve Apricot Jam Recipe
Apricot jam is a versatile delight that can elevate various dishes. Whether you’re spreading it on toast, using it in desserts, or adding a touch to savory meals, there are many ways to enjoy this sweet treat.
On Toast or Bread
- Freshly baked bread – Spread a generous layer of apricot jam on warm, toasted bread for a delicious breakfast.
- Croissants – Pair your apricot jam with flaky croissants for a delightful brunch.
In Desserts
- Cheesecake topping – Drizzle apricot jam over cheesecake for added flavor and color.
- Yogurt parfaits – Mix apricot jam into yogurt layers with granola for a tasty snack or breakfast option.
With Cheese
- Cheese platter – Serve apricot jam alongside a variety of cheeses, such as brie or goat cheese, for a sweet contrast.
- Grilled cheese sandwiches – Add a layer of apricot jam inside grilled cheese sandwiches for an unexpected twist.
As a Glaze
- Meat glaze – Brush apricot jam over roasted chicken or turkey before serving to enhance flavor and presentation.
- Vegetable glaze – Toss roasted vegetables with melted apricot jam for a sweet and savory side dish.
How to Perfect Apricot Jam Recipe
To make your apricot jam even more delightful, consider these helpful tips. These suggestions will ensure that your jam turns out perfectly every time.
- Choose ripe apricots – Select fully ripe apricots for the best flavor and sweetness in your jam.
- Measure accurately – Use precise measurements of sugar and lemon juice to achieve the desired consistency and taste.
- Use fresh jars – Ensure your jars are clean and hot before filling them; this helps with the sealing process.
- Check the consistency – If you prefer thicker jam, allow it to boil longer while stirring frequently.
- Cool properly – Let jars cool completely before checking seals; this ensures proper preservation.
Best Side Dishes for Apricot Jam Recipe
Pairing your apricot jam with side dishes can enhance your meal. Here are some excellent sides to consider:
- Brie Cheese – Creamy brie complements the sweetness of apricot jam beautifully; serve it on crackers or bread.
- Roasted Chicken – The savory flavors of roasted chicken blend well with the sweet notes of apricot jam as a glaze.
- Creamy Mashed Potatoes – Add a dollop of apricot jam on top of mashed potatoes for an unexpected burst of flavor.
- Savory Oatmeal – Stir in some apricot jam into oatmeal along with nuts and spices for an interesting breakfast option.
- Grilled Vegetables – Toss grilled zucchini or bell peppers with a bit of apricot jam to add sweetness to your veggies.
- Stuffed Peppers – Mix cooked rice and ground turkey inside peppers, then drizzle with warmed apricot jam before baking.
Common Mistakes to Avoid
Making apricot jam can be a delightful experience, but there are a few common pitfalls to watch out for.
- Boldly ignoring measurements: Using incorrect measurements can alter the consistency and flavor. Always measure your ingredients carefully to ensure the best results.
- Boldly skipping sterilization: Failing to sterilize jars can lead to spoilage. Make sure to wash jars and lids in hot soapy water and rinse them well before use.
- Boldly undercooking the jam: Not cooking the mixture long enough can result in a runny texture. Allow it to boil for at least 30 minutes while stirring frequently.
- Boldly neglecting seals: If jar lids do not seal properly, your jam will spoil quickly. After cooling, press the center of each lid; if it springs back, refrigerate that jar immediately.
- Boldly using unripe fruit: Unripe apricots may not provide the sweetness needed. Choose ripe apricots for a more flavorful jam.
Storage & Reheating Instructions
Refrigerator Storage
- Store homemade apricot jam in clean, airtight jars.
- It lasts for up to 3 weeks in the refrigerator after opening.
Freezing Apricot Jam Recipe
- For longer storage, freeze the jam in freezer-safe containers.
- Frozen apricot jam maintains quality for up to 1 year.
Reheating Apricot Jam Recipe
- Oven: Preheat your oven to 350°F (175°C). Place the jar in a warm oven until heated through.
- Microwave: Heat on medium power in a microwave-safe bowl, stirring every 15 seconds until warm.
- Stovetop: Gently heat in a saucepan over low heat, stirring frequently until warmed through.
Frequently Asked Questions
Here are some common questions about this apricot jam recipe.
How can I make a Sugar Free Apricot Jam Recipe?
You can substitute sugar with natural sweeteners like stevia or erythritol. Adjust according to taste preferences.
Can I use dried fruits for this recipe?
While fresh apricots yield the best results, you can make jam from dried apricots by soaking them first until tender. Blend with lemon juice and sugar as per taste.
What is the best way to use canned apricot jam?
Canned apricot jam is versatile! Spread it on toast, swirl it into yogurt, or use it as a filling for pastries and desserts.
How do I know if my Apricot Jam Recipe is done?
The jam is ready when it reaches a full rolling boil for 30 minutes and passes the plate test—spoon some onto a cold plate; if it gels as it cools, it’s done.
Final Thoughts
This Apricot Jam Recipe offers a delicious burst of sweetness that enhances many dishes. Its versatility allows you to enjoy it on toast or as an ingredient in desserts. Feel free to customize with spices or add-ins like jalapeños for a unique twist!
Apricot Jam Recipe
Indulge in the sweetness of summer with this easy Apricot Jam Recipe, perfect for elevating your breakfast or dessert game. Homemade apricot jam captures the vibrant flavors of fresh apricots, providing a delightful balance of sweet and tangy that’s hard to resist. Whether you spread it on warm toast, layer it into desserts, or use it as a glaze for savory dishes, this versatile jam is sure to impress. Plus, with minimal ingredients and a simple preparation process, anyone can create their own batch at home. Enjoy the satisfaction of crafting delicious homemade preserves that make fantastic gifts or personal treats.
- Prep Time: 20 minutes
- Cook Time: 30 minutes
- Total Time: 50 minutes
- Yield: Approximately 5 pints 1x
- Category: Dessert
- Method: Canning
- Cuisine: American
Ingredients
- 8 cups diced apricots
- 1/4 cup lemon juice
- 6 cups sugar
Instructions
- Sterilize jars by washing them in hot soapy water and rinsing well.
- In a large pot, combine diced apricots, lemon juice, and sugar. Stir well.
- Bring to a boil over medium-high heat, stirring until sugar dissolves.
- Maintain a rolling boil for 30 minutes while stirring frequently.
- Ladle the hot mixture into prepared jars, filling them within 1/4 inch from the top.
- Seal jars with lids and process in boiling-water canner for 10 minutes.
- Remove jars and let cool completely while checking seals.
Nutrition
- Serving Size: 1 tablespoon
- Calories: 50
- Sugar: 12g
- Sodium: 0mg
- Fat: 0g
- Saturated Fat: 0g
- Unsaturated Fat: 0g
- Trans Fat: 0g
- Carbohydrates: 13g
- Fiber: 0g
- Protein: <1g
- Cholesterol: 0mg